Sunday, February 27, 2011

Shooting for Stock Photography


Cuba Gallery: Typography / water ripple / blue / red / color / reflection / ocean / texture background / ship / sea / boat / numbers / photography by ►CubaGallery


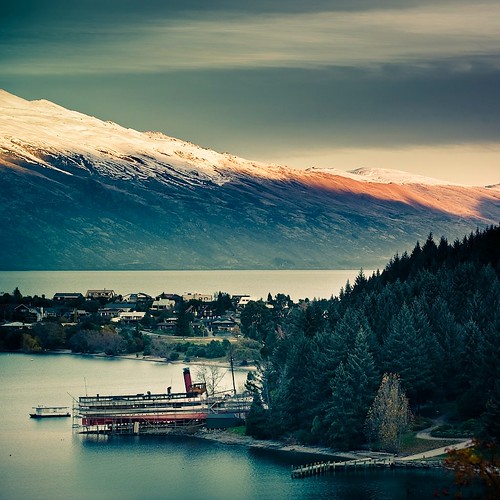
Photo Credit: celtics baby clothes


A great way to earn money and learn a lot in the internet is participating in stock photography. Stock photography has been around for a while. And there are a lot of great stock sites that sell photographs for a reasonable price.

Just how and what should you shoot to be able to participate in stock photography?

Photographers say you should start with the concept. But the very first thing you should do is to know your equipment. I literally spent ten times more time trying to know how my camera works than thinking of something to shoot.

Stock photography is a very demanding industry. It's as close as you'll get to professional photography. It requires you to be able to produce images of the highest quality. That is because this industry is very competitive.

Try shooting the same subject with different settings. You should know how your camera reacts with different kinds of light. You should also know how it responds to different levels of illumination. Note the differences you see and keep them in mind.

Next you need a concept. Your images should present an idea, a thought or an expression. Consider a photograph of a man typing on a computer. What is he doing? Why is he typing? Is he working? Is he Blogging? Or just playing?

Designers buy stock images because of the concept they present - not because they look good. Stock photos are used in web sites, brochures, magazines, publications, advertisements, and almost anything that has a print.

So you need to have an image that has a concept that satisfies the needs of the would-be buyers of your pictures.

Then, you need a lot of light. Stock photos require that images have the right level of illumination and contrast. They need to be clear. If you can't afford a big set-up, you can always use desk lamps or even the sun.

You'll also need a computer and two kinds of programs: noise reduction tool and a photo editing application. Most stock photographs go through a noise reduction process. They also get a little tweaking in color, contrast and brightness.

Stock photographs need to be as close to perfect as possible. It's like what they say in the computer graphics industry: "it does not matter how you do it as long as you get the job done." Don't think that editing a photo in your pc is cheating. That only goes for journalism.

The next is pretty simple. You need a stock agency to upload your images to. Or you can showcase your work in your own site. Uploading in stock agencies is better. That is because you can find out where and how to improve. Use their powerful community to find out your weakness and strengths as a photographer.

Then when you have all this, what you need to do next is to be consistent and improve and improve and improve. You need to keep up with the ever demanding industries. If you don't, you'll get left behind.


Wildlife Photography: Tips to Learn the Basics of Wildlife Photography


Cuba Gallery: New Zealand / landscape / mountains / lake / amazing / beautiful / nature / trees / sky / clouds / photography by ►CubaGallery


photo source


If you really want to learn the art of wildlife photography, then you should be aware of the basics of wildlife photography. It is rightly said that wildlife photography is one of the most challenging but rewarding hobby or career. It takes honest practice, persistence and hard work to master the real art of wildlife photography.

For mastering wildlife photography you have to have the basic knowledge of camera handling. As majority of the photos you take will be captured with the help of telephoto lens. This will test your patience and dedication as you have to wait a much longer time for the animal to come in the range and taking right pictures through right angles before that wild animal leaves from the site. Many of the times the animals you want to shoot will be yards away from you so that you have to take your pictures with more precision and care with zoom lenses.

While shooting wildlife you always have to watch out for minute movements happening around you. And for that purpose you have to be attentive for the longer time. The sunlight also plays a very important role in taking these wildlife pictures. For this purpose your camera should have the proper adjustments according to the various angles of sunlight so that pictures will be much clearer without any fuzz.

Also wildlife photography is all about capturing a particular moment of the wildlife. It makes or breaks your photography style. Many of the best wildlife photographers out there are really skillful in shooting the exact speed and momentum of the particular animal they are watching. But to be the best wildlife photographer out there you should first master the basics and you can begin this process by starting to shoot your own home pets. If you learn to shoot their natural movements and habits in their natural style then you can say that you are ready for outdoor wildlife photography.

There are no shortcuts to learn the basics of wildlife photography. Rather you have to practice it religiously and with full devotion. You should have to pay a special attention to your cameras. You have to take care that your camera has a quick shutter speed which is very necessary to take more than one shot as you roam around the wildlife to take pictures. In this type of photography most of the times you have to follow your subject to shoot many pictures at a time in one shot. This process is mainly known as "panning" which consists of taking faster pictures in one snap as you mover closer to a particular animal you want to shoot.

Thus wildlife photography is all about your patience, persistence and shooting skill where you need to wait a longer time to take the perfect picture. But at the end of the day it is also the most satisfying art where you get the really thrilling and enjoyable experience to cherish for.

Saturday, February 26, 2011

Six Tips to Help You Clean and Organize Your Photography Studio


Cuba Gallery: Cat / pets / animals / eyes / kitten / cute / photography by ►CubaGallery


source,credit


1. Photography Studio Organization - Use good old fashion hanging files.

Believe it or not, in this digital age, the classic green hanging folder is still a great organization tool. Using manila folders to organize your photography studio's bills, invoices, and receipts is a good start. It is a lost cause however, if you don't have an organized place to put them. The hanging folder is the perfect place to put them

Don't have a filing cabinet to put the hanging folders in? Not a problem. There are several options available at your local retail store. I prefer the clear Rubbermaid bins. They are about 8 inches wide. This means they are easily stored in closets or on a bookshelf. Since photography studio space is usually valuable real estate, these smaller file boxes might be the way to go.

2. Photography Studio Organization - File your files

A great way to keep your files organized is to keep a file of all your files. What do I mean by this? Keep a piece of paper in your photography studio with all of your file folders on with their names. If the folders have sub-folders, list those too.

This will let you see if you have folders that overlap so that you can condense your folders. For example, there is no point in having studio file and a studio equipment file.

You could have this list written on a piece of paper, but that would just be one more piece of paper to file. Try keeping this record in a word or excel document. That way you have one less piece of paper in your office and you can update it much easier when you add new folders and files.

3. Photography Studio Organization - Throw things away

For some reason most photography studio owners have a fear of throwing client paperwork and photos away. There are certain things that you just don't need to hang on to. If you are a digital photographer there is no reason to hold on to basic prints. Create a varity of back-ups and toss the prints. You can always re-print them. If you aren't a digital photographer and have a traditional photography studio, invest in a scanner. This way, if you must hold on to prints for color purposes, you can scan them and toss the print.

There are some things you need to hold onto though.

Tax items are one thing you should hold onto. You should save your tax returns forever. The rest of your tax reports and receipts should be saved for no longer than six years.

Throw away papers that you don't have an immediate need for, can get a copy of easy, or that don't have any tax or legal reason to hold on to.

If you feel like you need to hold on to all your photography studios paperwork, than try scanning it all onto a portable hard drive. Then you can throw all the papers away. It will take more time than growing through all the papers away, but at least the hard drive will take up less space in your office.

You can scan model's head shots for reference later. You can scan pose ideas from magazines so you don't have clipping all over your photography studio.

4. Photography Studio Organization - "Assorted" Folders

How many other, assorted, or misc files do you have in your photography studio? You know, the folder that you put everything in that you just don't know where else to put it. That isn't organization. Odds are you can just throw it away altogether. A good rule of thumb is, if you haven't needed it or touched it in a year then toss it.

5. Photography Studio Organization - Get rid of business cards

There are so many ways to organize all your business cards, model head shots, and contact information. There are plenty of ways to get rid of it altogether as well. A simple approach is to take the business card or headshot and tape it or staple it the file folder it is associated with. At least then it is filed away instead of in a pile on your desk or in a drawer.

There are lots of gadgets out there made for scanning in business cards to your computer. If you are a digital photography studio, you probably already have a scanner, put it to good use. If you don't have the money for one of these than just take some time to enter the contact information into your electronic address book. Outlook has a great address book or you could even use your email clients address book. Anything is better than having them just laying around waiting to get lost.

6. Photography Studio Organization - Use the computer

Try using your photography studio's computer as much as possible. Use it to make your to-do lists, create address books, file documents, and more. The more you keep or put into your computer the less you have in your photography studio.

As I mentioned before, there are plenty of gadgets out there that can help you scan your files into the computer. Take advantage of them!

DIY Wedding Photography on a Budget


Cuba Gallery: Wave / beach / ocean / sea / green / nature / people / Coney Island / New York / photography by ►CubaGallery


source


So, your wedding is fast approaching and you want memories that will last a lifetime. However, you are on a budget and don't have a lot of money to spend for a professional wedding photographer. You can still get professional-looking, creative, memorable pictures with DIY wedding photography.

The first thing to do is to find someone who takes great pictures. This doesn't have to do be a professional photographer. Many people have a "great eye" and instinctively know how to take great pictures. Think of friends or family members who you've complimented on their photography from vacations, for example. Another way to find a cheap wedding photographer is to look on local college bulletin boards, or post on them yourself in the art department or photography department. Many students have amazing talent, but since they are still a bit inexperienced, will be your wedding photographer for a fraction of the price of a professional wedding photographer. Some may even photograph your wedding for free, for no more than a free meal and use of your wedding pictures for their portfolio. You can also consider putting an ad on Craigslist for a hobbyist who is not a professional wedding photographer, but has an artistic eye and loves to take pictures. Get samples of work and negotiate a price you are both pleased with.

Whether you use a talented stranger or an artistically-inclined friend or family member as your wedding photographer, make sure they have a good camera. You may even consider purchasing a good quality, digital camera that you can give them as their "payment". If you need to purchase a camera for your DIY wedding photography, make sure you give it to the wedding photographer in plenty of time for them to learn the ins and outs of the camera, so they can adjust the settings. Digital cameras also allow for easy editing, so you or your DIY wedding photographer can edit your wedding pictures. Also, digital cameras have a large capacity to store many pictures, with a memory card they can hold hundreds of pictures, so you will have plenty of wedding photos to choose from to preserve your special day.

Another idea is to meet with your DIY wedding photographer to develop a plan of what you want photographed. Remember, since you will be saving a lot of money by not hiring a professional wedding photographer, you will have to do some of the work yourself. This includes providing the DIY wedding photographer with a list of what you want photographed. This may include photographs of the wedding rings, the wedding invitations, the bridal party, the groomsmen, the family of the bride, the family of the groom, the bride and groom's first kiss, the wedding service, etc. This will help you and your DIY wedding photographer be on the same page and know each other's expectations beforehand, so you get exactly what you want on your special day.

Also, encourage others to take pictures of your wedding. Some of the best wedding photography are those wonderfully candid moments caught by some of the guests. Some wedding couples choose to put disposable cameras on tables for guests to take photographs of, then ask that they leave the cameras when they leave the wedding reception. Some give the cameras out as wedding favors and ask that any great wedding photographs be sent to the married couple.

Lastly, consider the best of both worlds. You can hire a professional wedding photographer for a short period of time to take a few very specific pictures, then rely on your DIY photographer and wedding guests to take the rest of the photographs. This will eliminate a lot of cost for a professional wedding photographer. You can also opt to don your wedding attire a few days after the event and go to a studio to have a few professional pictures taken.

Remember, it doesn't take a professional photographer to take some amazing, creative, professional-looking wedding photography. Have a great day!